.png)
Add Patient to Monitoring
In this article
Introduction & Prerequisites
There are many steps in the process that will occur prior to you getting a call from the nurse that they would like to add a patient. Each of these steps is subject to local processes. Specifically, the things that may be happening at the hospital include:
- The nurse has confirmed that this patient meets the inclusion criteria. This means that they fit a specific profile that's ideal and appropriate for virtual sitting.
- Typical Inclusion Criteria
- Fall risk/history of falls
- Elopement
- Wandering
- Impulsive
- Confused
- Agitated
- Dementia
- Delirium
- Sundowners
- Safety of lines, tubes or drains
- Traumatic brain injury
- Stroke
- Typical Exclusion Criteria
- Suicide risk
- May have eating disorders
- Alcohol or substance withdrawal
- Patient on behavioral restraint
- Patient unable to redirect verbally
- A deaf patients
- Typical Inclusion Criteria
- Based on local procedures, the nurse may have also gained approval from the Charge Nurse.
- The nurse may have communicated with the patient and the family to explain the use of the video device in the room.
- And finally, unless video devices are mounted locally in each room, the nurse would request the PCA / CNA to move an available video device cart into the room.
The Virtual Monitoring Process
The process is typically initiated with a call from the RN on the hospital floor to inform you that they will be adding a new virtual monitoring patient. You should anticipate that they will share the following patient details with you: Name, DOB, MRN, Room # and reason for monitoring. If they are using a mobile cart, they will also share the camera number that will be placed in the patient's room.
1️⃣ Select Manage Monitoring from the sidebar

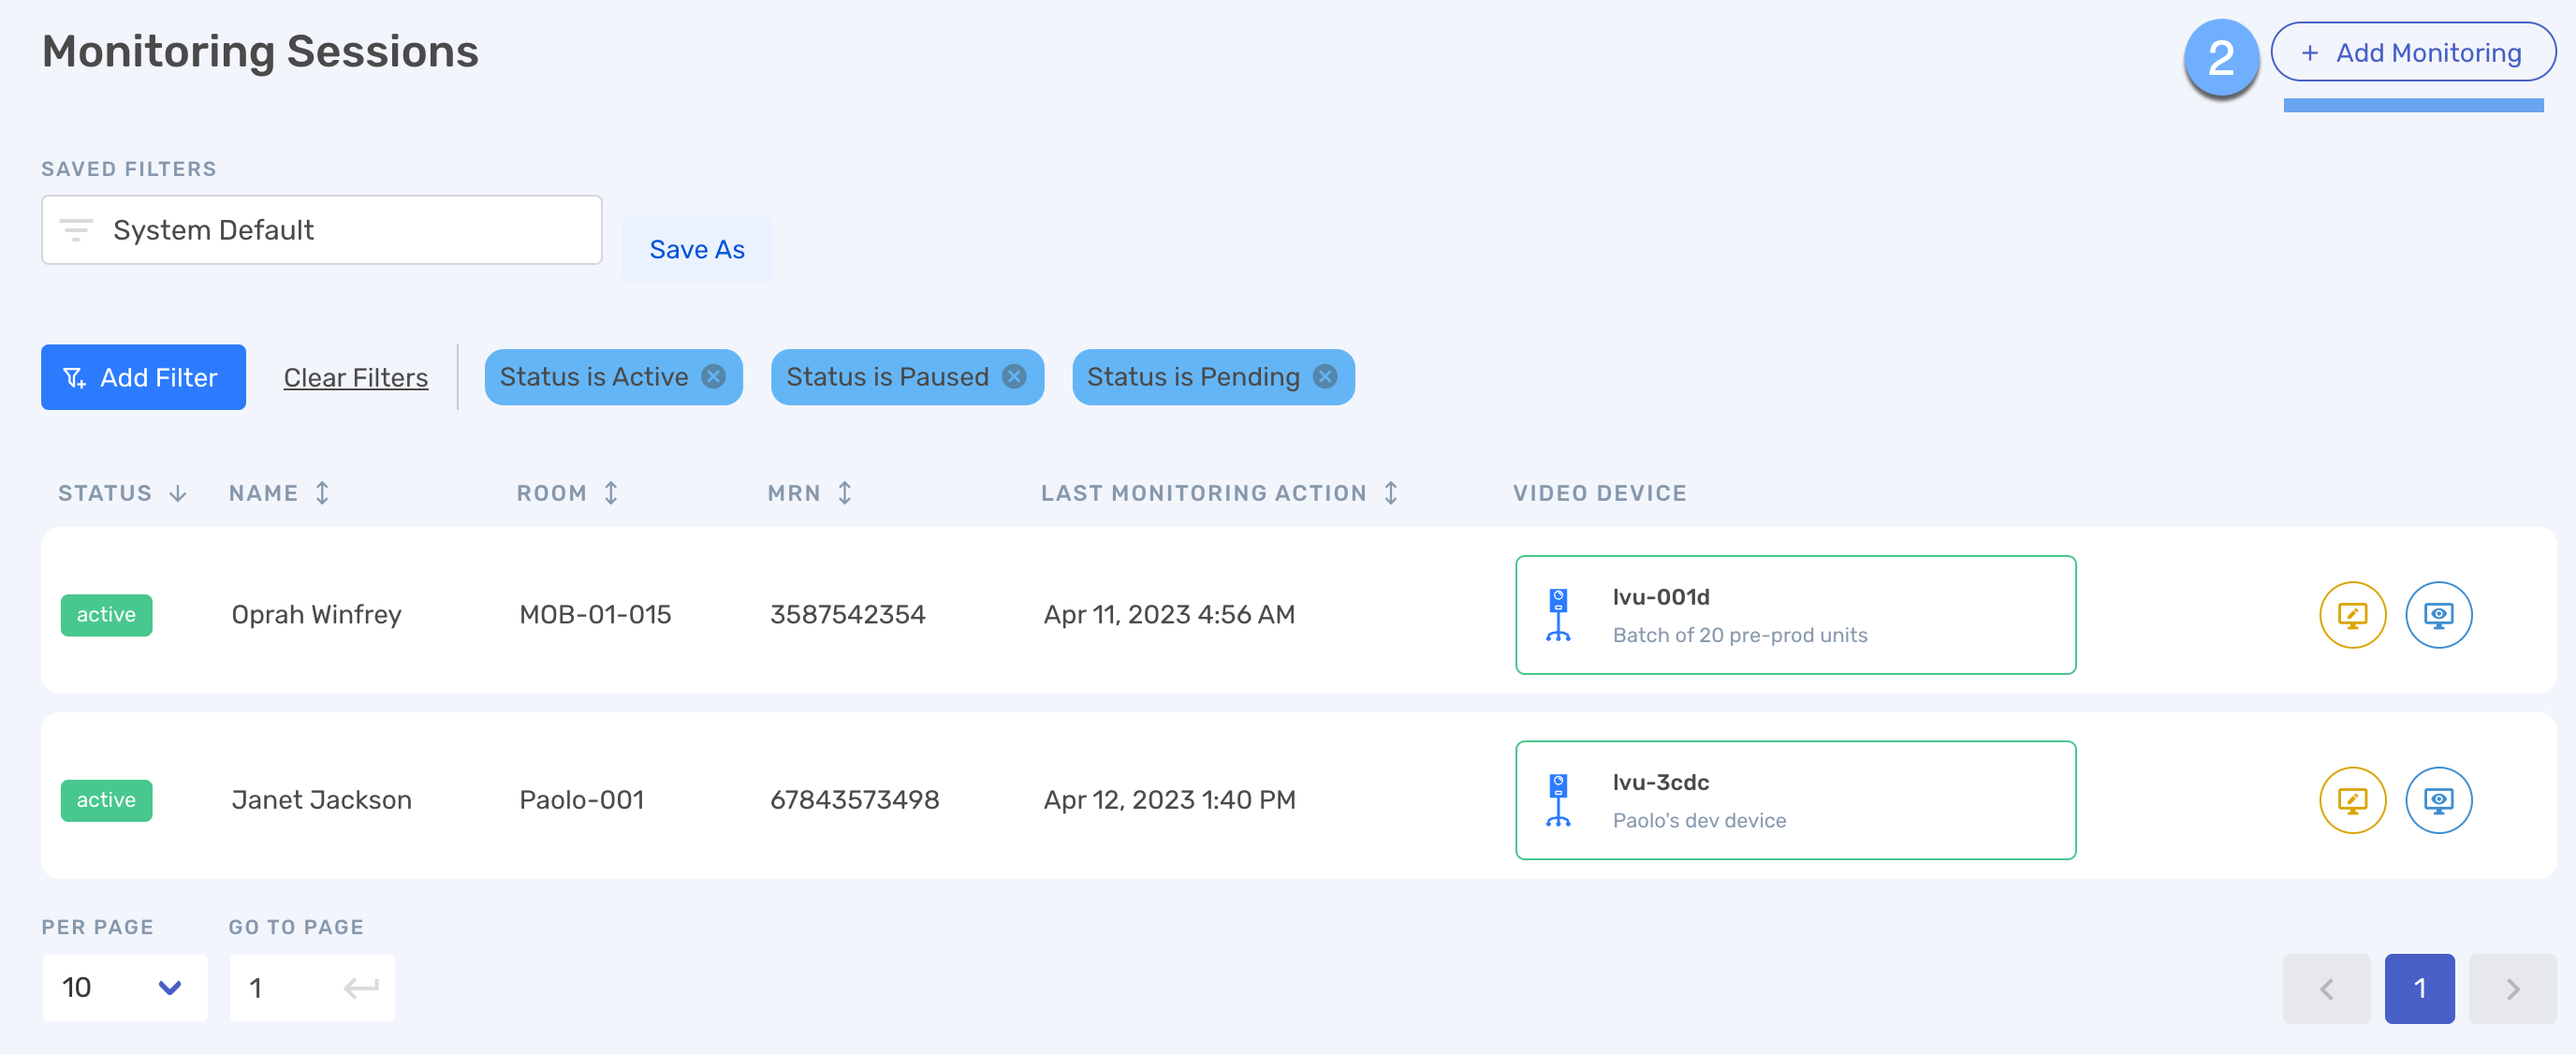
2️⃣ Click the Add Monitoring button
3️⃣ Select the patient
Click the checkbox next to the correct patient.
💡 Tip
If you do not see the patient in the list, you can:
(1) Sort the columns by first name, last name or MRN
(2) Filter by any of the same fields

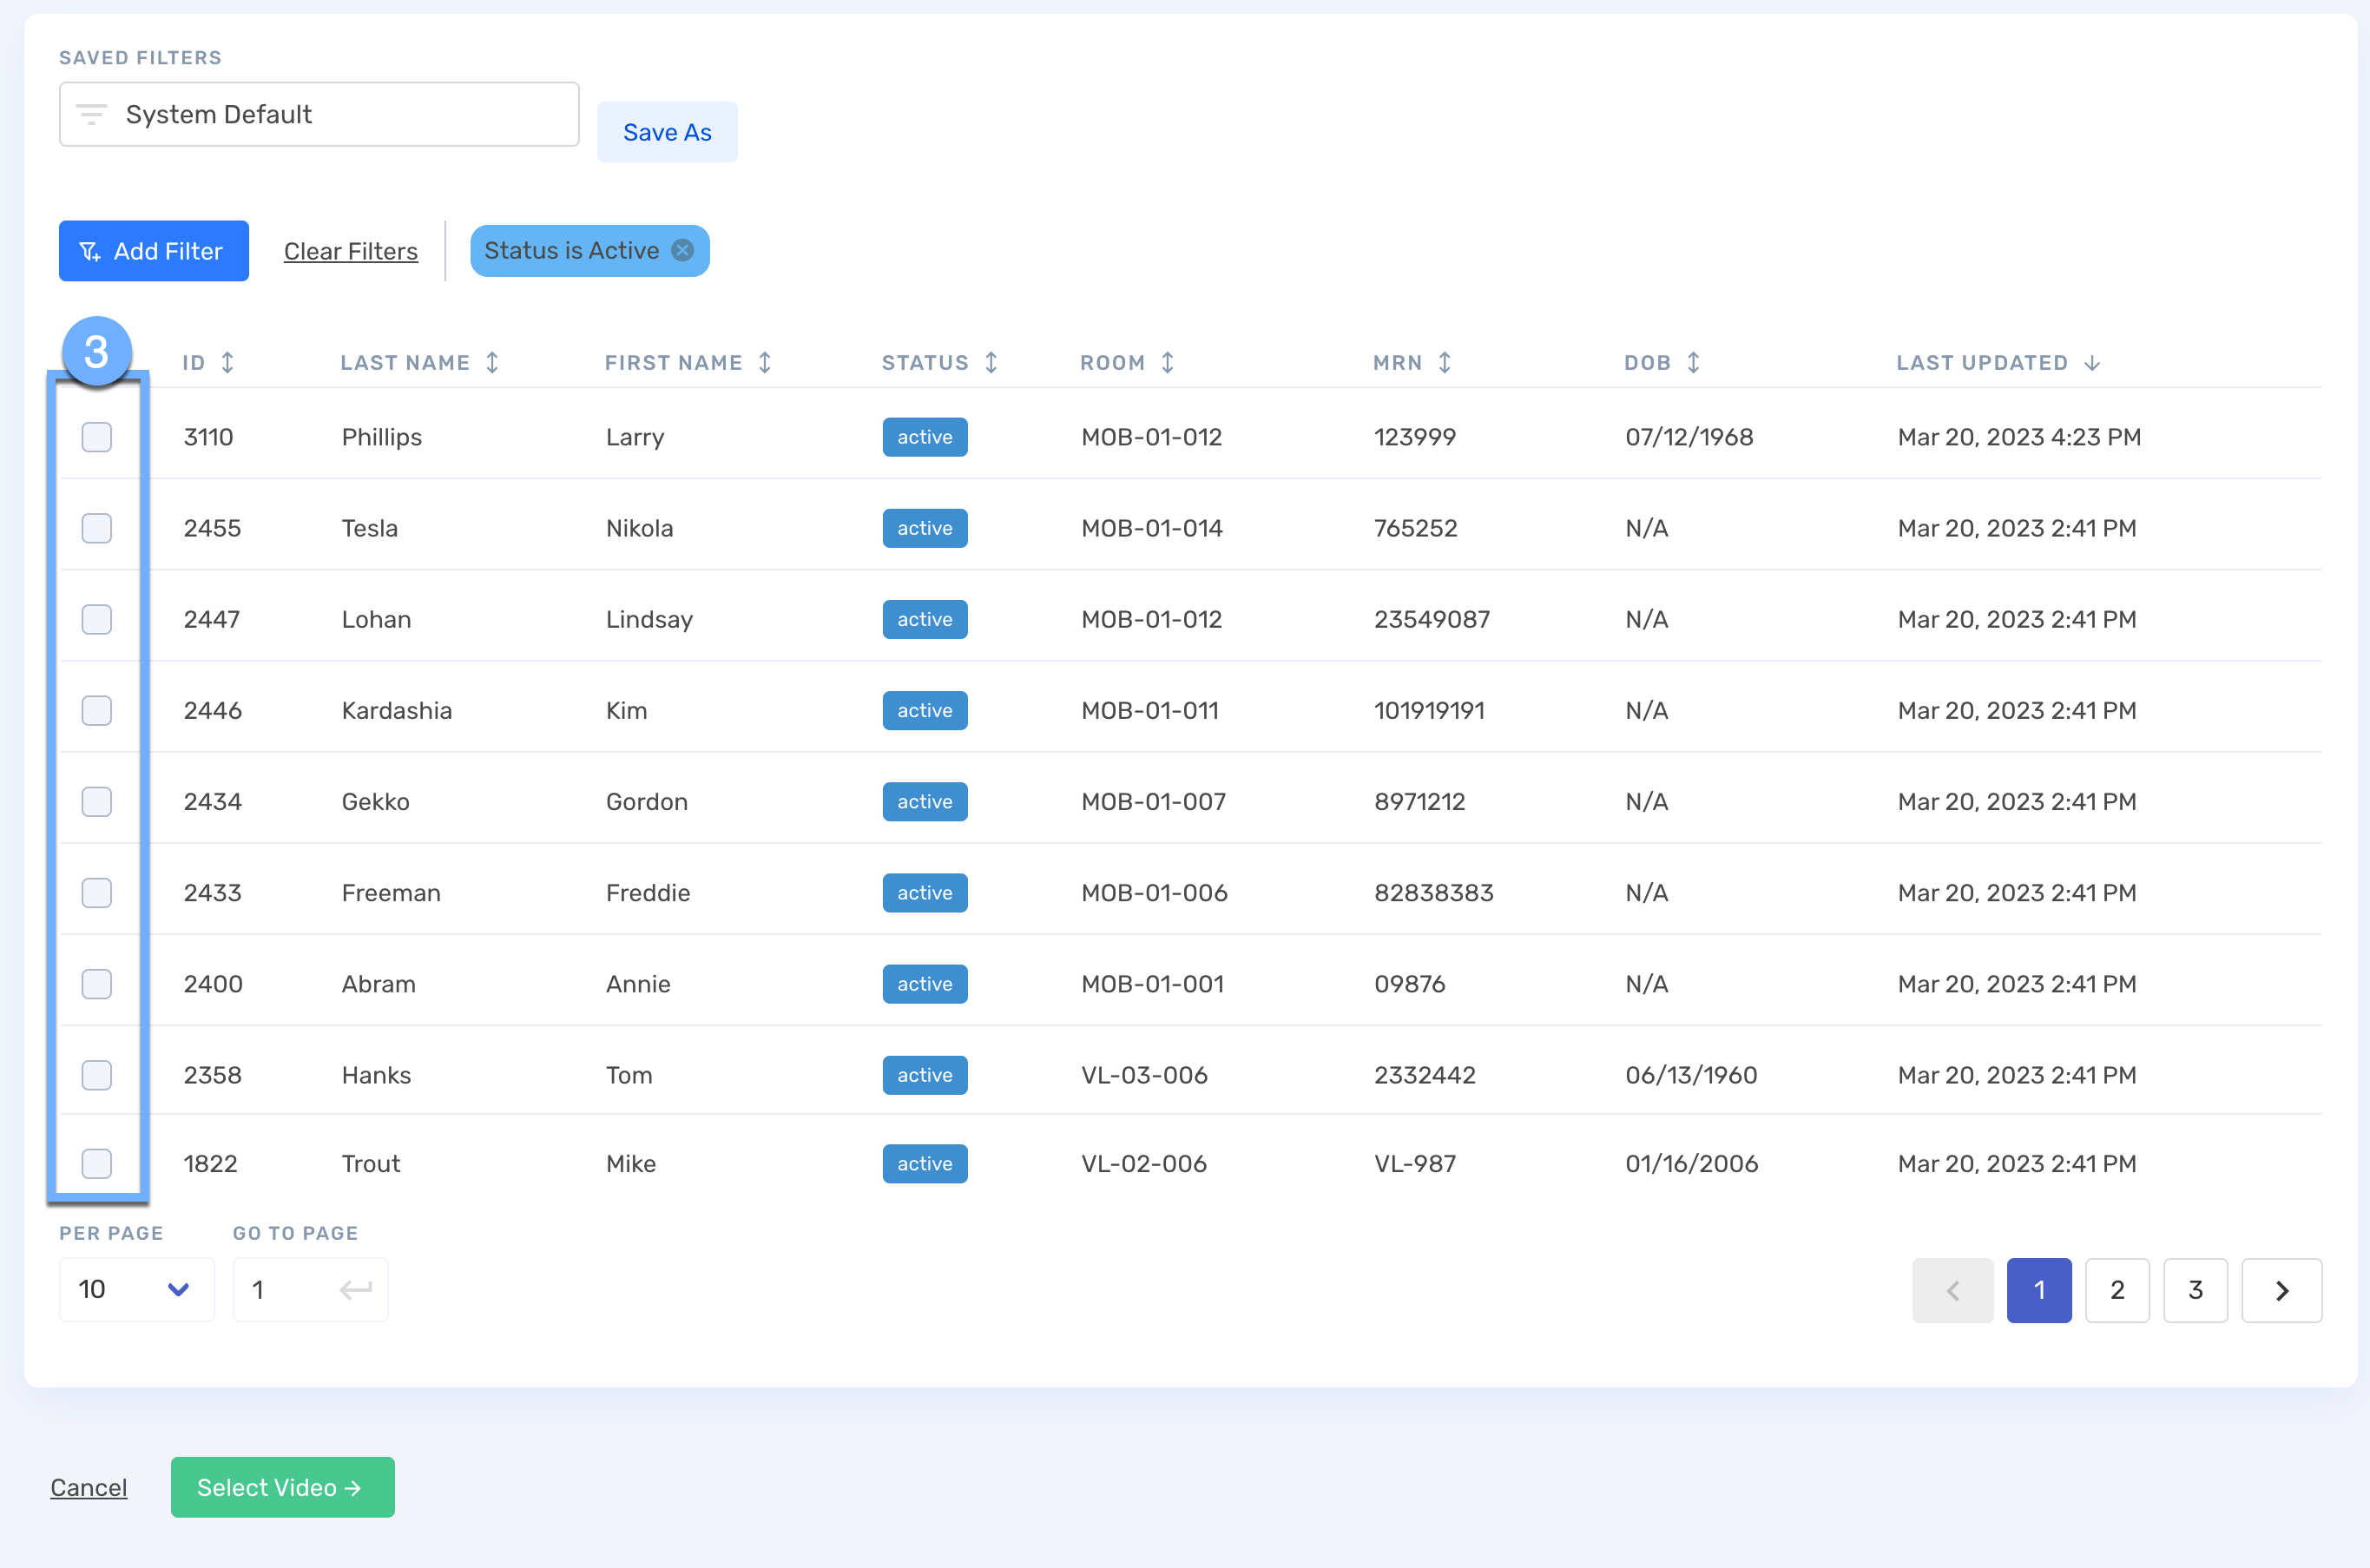
Click the Select Video button once you've selected the correct patient.
4️⃣ Select the correct Video Device
The correct camera should have Status = online (green). If it does not, it's possible that they are still moving the camera into the room.

Click the Attach Video button once you've selected the correct camera.
5️⃣ Verify and Confirm
This is a review step to ensure you've selected the correct patient and the correct camera. You also have the opportunity in this step to update the default Notes and Attributes.
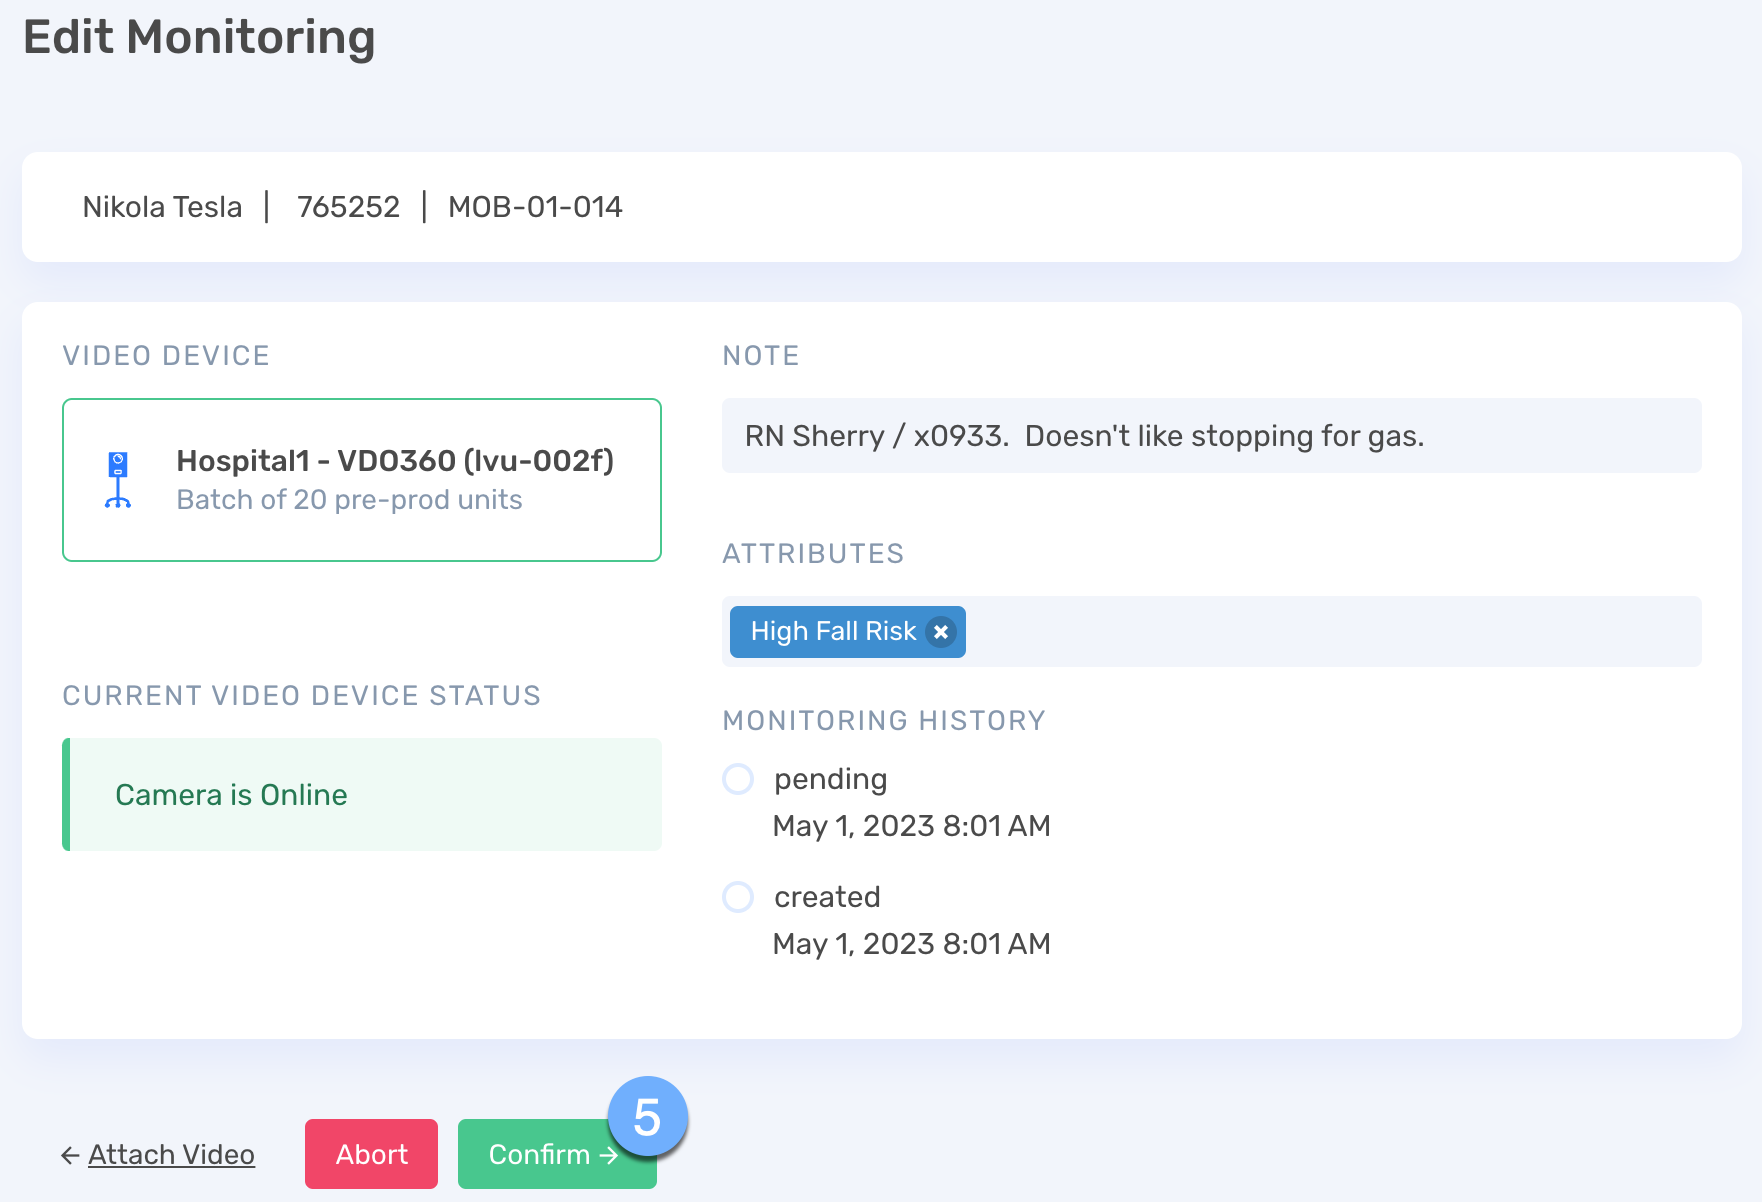
Click the Confirm button once you've verified the details. The patient's Monitoring session is not started and you can go to Central Monitoring to view the patient.
6️⃣ Select Central Monitoring from the sidebar

7️⃣ Click the View button and then Add Block

8️⃣ From the Add New Block pop-up, find and select the patient

9️⃣ Select the Live Video block type and click Save

🔟 Click Connect on the Live Video Block

You've successfully connected to the patient. 👍

Initial Communication with the Patient
It is a best practice upon starting a new live video session to establish verbal contact with the room.
This step serves several purposes:
- It ensures the 2-way audio is working properly
- It introduces the patient to your voice and name
- It ensures the patient can follow instructions
- It ensures the camera is positioned correctly for you to see the patient